Oct. 2014 19

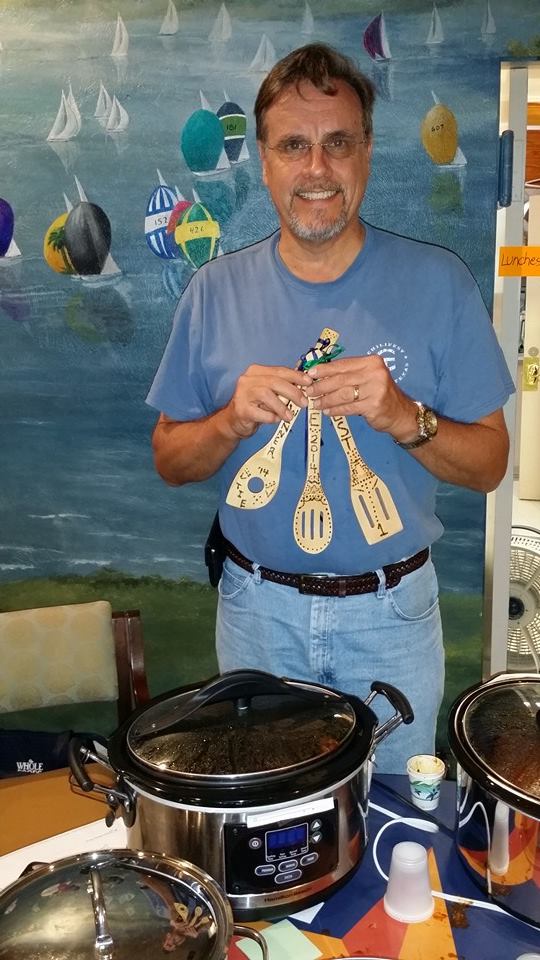
Panther Creek Heat, Winner of 2014 Dallas Corinthian Yacht Club Terlingua-in-Exile Chili Cook Off

Yesterday I entered my very first cooking competition, the Dallas Corinthian Yacht Club’s Terlingua-in-Exhile Chili Cook Off.  My usual chili is pretty good, but for competition I wanted to take my game up a few notches.  I consulted the all-seeing Google and found a number of really great recipes (along with some really weak recipes that I will not link),  A Bowl of Red is supposed to be awesome rather than wimpy.  And let’s agree not to talk about beans.

This recipe is heavily based on Lisa Fain’s Seven-Chile Texas Chili recipe, but I added some ideas from a couple of other sources too:

http://www.homesicktexan.com/2006/10/how-to-make-pot-of-texas-red-part-one_15.html

http://www.homesicktexan.com/2006/10/how-to-make-pot-of-texas-red-part-two_18.html

http://www.esquire.com/features/guy-food/texas-chili-recipe-ll-1208

http://www.seriouseats.com/2011/11/real-texas-chili-con-carne.html (Good grief, this one includes beans!  That ain’t chili.  Good ideas though!)

A word of warning: this is not your week-day chile.  It takes more preparation and longer cooking than most chili recipes you will find.  I started around noon and ran out the door with it at about 4:15pm, barely making it to the competition in time at 4:30pm.

Panther Creek Heat
Winner of 2014 Dallas Corinthian Yacht Club Terlingua-in-Exile Chili Cookoff

Ingredients
6 dried ancho chiles (All of the chiles I used were from Pendery’s)
2 dried pasillia chiles
2 dried mulatto chiles
2 dried guajillo chiles *
2 dried chipotle chiles (I did not have this so I used 1/2 cup chipotle flakes)
4 dried chiles de arbol
about 3 or 4 cups of water
1 Tbsp extra virgin olive oil
6 pieces beef bacon
4 pounds chili-ground beef (I used Burgundy Pasture Beef‘s grass-fed, chili-ground beef)
2 medium red onions diced
6 cloves garlic, minced
1 shot espresso
1 Tbsp grated 70% chocolate
1 tsp Marmite
2 tsp Soy Sauce
2 filets of anchovy
3 cups chicken broth
2 pkg Savory Choice beef broth concentrate
2 tsp dried oregano
1/2 tsp ground cinnamon
1/2 tsp ground clove
1/2 tsp ground allspice
1/2 tsp ground coriander
1/2 tsp ground turmeric
1/2 tsp ground black pepper
4 dried pequin chiles
1 tsp fine sea salt
1 tsp ground cumin
1 shot sour mash whiskey
2 Tbsp fine ground masa harina

Procedure

Heat your oven to 200 degrees.  That sounds low, but we will be simmering the chile for 3 hours at this low temperature.

Cut off stems from dried chiles, cut open, remove seeds and any pith. It is Ok if you leave a few seeds. In a dry skillet heated to medium-high, toast all the chiles, except the pequin chiles, in the pan. Turn the chiles every 10 or 15 seconds to prevent them from burning.  When the chiles begin to puff, pour in enough water to cover the chiles. When the water boils, turn off the heat and let the chiles soak for about 30 minutes.

Put olive oil in a large dutch oven or other oven-safe pot, turn on heat to medium and fry the beef bacon until slightly crispy. Drain the bacon on paper towels.  Leave the grease in the pot.
Cook the ground beef, browning the outside before breaking into medium clumps.  You may want to do this in two batches, 2 pounds at a time. Scoop the meat out of the pot with a slotted spoon, allowing most of the fat to drain back into the pot. Discard all but about 1 Tbsp of fat.  Soften the onions in the fat on medium heat until they are translucent.  Leave the heat on. Mix the miced garlic into the onions and put the following herbs and spices into the mixture:
cinnamon, oregano, clove, allspice, coriander, turmeric, salt and black pepper.

(Do not put the cumin in yet!  It will become too bitter if it cooks to long.)

Chop up the anchovy filets.  Put the anchovies, Marmite, and soy sauce in with the onion mixture. Chop the beef bacon, and put both it and the browned ground beef in the onion mixture. Pour in the chicken broth and the beef broth concentrate.  Stir well.  Bring to boil and then set to simmer.

When the chiles have finished soaking, drain through a fine colander and discard the now-bitter water.  Put the chiles in a blender or large food processor with 1 cup of water.  Put in the 4 pequin chiles and puree.  There may be a few bits that do not liquefy but that will be all right.

Pour the chile puree into the beef and onion mixture.  Pour in the shot of espresso and put in the grated chocolate and stir well. When this mix starts to bubble, turn off the range top, put the lid on the pot, and transfer the lidded pot to the oven.

Let this ambrosia simmer in the oven for 3 hours.

Remove the pot from the oven at about 3 hours and put back on low range heat.  Put the cumin in the chili and stir well.  Thoroughly mix the masa harina with about 3 Tablespoons of warm water.  Mix the masa harina paste into the chili and stir well.  Pour the whiskey shot into the chili and stir.  Salt to taste (it probably will not need any though with the salt and anchovies.).  Let the chili heat for about 15 to 30 minutes to allow the final ingredients to blend flavors with the chili.

Proudly serve with corn bread, pinto beans on the side, chopped white onions, grated cheddar cheese, and seeded and chopped jalapenos.

So how did I do?

Terlingua-in-Exhile

Overall winner!  More importantly, I got to have some awesome chili!

(* Update 11/3/2014 I just noticed that the 2 guajillo chiles were not in the recipe above, now corrected.)

Dec. 2012 7

Cheese Maker’s Form

I am getting ready to go take an advanced cheese making class in Italian Cheeses (http://threeshepherdscheese.com/Texasclass2012.aspx) and it occurred to me that one particularly helpful tool for a cheese maker is the form for recording a particular cheese’s progress.  While making a cheese it is a good idea to record the times, temperatures, ingredients, steps and pH so that you can compare variations and what caused a particular cheese to be great or bad.
My favorite form is the DJCheeseMakingRecord that DeejayDebi posted on the ChheseForum.com here: http://cheeseforum.org/forum/index.php?topic=2100.0

DeejayDebi posted both a PDF and an Excel spreadsheet of the form.  Look for reply #6 on the link above for the downloads.

Happy Cheese Making!

Sep. 2012 24

Great Pictures and Article about Pure Luck Farm and Dairy

There is a great tour of Pure Luck Farm and Dairy article here: http://austin.culturemap.com/newsdetail/09-24-12-11-09-pure-luck-farm-and-dairy-tour/.  At first I had thought the article was talking about how to take a tour, but no, it is an online tour showing pictures of the people, goats, farm and their cheese.

Jun. 2012 25

Creole Cream Cheese

Over at nolacuisine.com there is a great recipe for Creole Cream Cheese.  This looks quite similar to Quark and has some smart suggestions for the home chef about how to add a culture to the mix if you do not have a professional bulk set or direct set culture to work with. Essentially the recipes suggest using some buttermilk or yogurt to provide the culture.   The types of bacteria in each are slightly different from each other but either should provide a good soft cheese.  You may want to scrutinize the label of the yogurt or buttermilk to assure that the product contains active cultures.  It is also always a good idea to use fresh ingredients rather than that old yogurt from a couple of months ago hiding far back in the fridge.  😉

Homogenized Milk

There also is a comment made about whether homogenized milk will work.   Yes it will.   The point is not particularly relevant for this recipe because it calls for skim milk which has nearly no fat anyway.  Homogenization’s purpose is to reduce the diameter of fat globules so that they remain in suspension rather than rising to the top and forming a cream line.  I suspect this recipe will work well with whole milk as well as reduced fat milks.

The really important thing to look for is milk that has good “undamaged” milk proteins.  There are a number of processes that can damage milk proteins: old milk, freezing, dried milk and high or ultra high temperature pasteurization.  Any of these issues will cause problems getting a good set to the milk.  When milk proteins are fresh and undamaged, they have the ability to bond together to thicken and form a smooth custard-like texture.  Damaged proteins may create a curd that is grainy or runny.  You may be able to make cheese from these types of milk, but results will be a lot better with fresh milk that is either unpasteurized or pasteurized with a low-temperature technique.   Both of these are a bit harder to find and are unlikely to be at a large supermarket.  You can find many sources for great raw milk here: http://www.realmilk.com/

Cheesecake

There was a question about whether this could substitute in recipes, such as cheesecake, for store-bought cream cheese.  Generally yes, but you may need to reduce the amount of additional liquids, as store-bought cream cheese is typically pressed to remove some more of the whey, where this recipe uses simple draining to remove some of the whey.  This recipe will result in a wetter product.

Rennet

The precise amount of rennet needed for soft cheeses is a little loose especially because the strength of a rennet batch can vary and there are double strength and quadruple strength rennets.   I would suggest roughly 1 milliliter of single strength calf rennet for each gallon of milk.  You may find that you can use a little less but 1 ml per gallon is a good starting point.  I use one of those little plastic doodads from the drug store that are used to measure children’s liquid medications.  They are measured in milliliters and are reasonably priced.  It is a good idea to disperse the rennet in about a quarter cup of water just before adding the water and rennet to the milk because the rennet is pretty concentrated and starts working very quickly.  Rennet does not like alkalinity and tap water is often a little alkaline.  If the rennet sits in tap water that is alkaline for several minutes, the rennet will lose some of its potential to firm up the curds.  If you can use distilled water instead of tap water that will help.  If not, simply mix the rennet into the water immediately before putting the rennet-water mix into the milk.  That way the rennet is not exposed to the alkaline in the water long and the natural buffering ability of the milk will neutralize the alkaline water. The extra water just drains out with the whey which is mostly water also.

I use liquid rennet because it is easy to adjust the recipe to varying amounts of milk.   A small container of liquid rennet shold last a long time in a refrigerator (several months).  Given that 1 milliliter will dose a gallon of milk, a small 3 ounce bottle will last a long time for most people.  There are forms of rennet that come from vegetable or microorganism sources that will meet the needs of vegetarians and these are also normalized to meet the terms “single strength” and so on.  These are less suitable for cheeses that are to be aged for long periods because they generally result in some bitter flavors, but they may be fine for fresh cheeses like cream cheese.

Two Critical Factors in Cheesemaking

Time and temperature are critical issues to control for consistent results with cheese making.  If you vary the time or temperature much you will create a different product.  If you wait too long after putting in the rennet, the curd will be much firmer.  Strangely this results in a softer cheese in the end because you will have problems draining much whey from this firm curd.  Conversely if you wait a shorter time and have a much softer curd, you will be able to drain a lot more whey from it, resulting in a firmer cheese.   This may have been the cause of the putty-like cheese one commenter mentioned.

The rate of temperature drop after you heat the milk and put in the culture will have a large effect on the resulting cheese.  Most good bacteria flourish between 70 degrees F and 110 degrees F with the best growth somewhere between those extremes. .  If you heat the milk to 110 degrees and then let it come down to room temperature several things will bear on the rate of change.  If the room temperature is low, as in winter, the cultured milk will rapidly cool.  If the pan is sitting on a metal surface then the temperature will rapidly cool.  If air is flowing briskly by the pan the temperature will rapidly cool.  I would consider putting in the culture when the temperature reaches 70 degrees on the way up, and raise the temperature only to about 105 degrees (the pan will be warmer than the milk and continue to provide some heat).  Then I would set the pot on a hot pot holder and put a blanket or large towel around the pot to hold the warmth in.

Buttermilk

There was a question about whether real milk left over from making butter could be used as the source of culture.  In this case the answer is a definite maybe.  You can make butter or you can make cultured butter.  If you make cultured butter then the answer is YES.  The byproduct of cultured butter is cultured buttermilk.  If you just put cream in a churn and try to use the resulting milk the answer is NO.  The byproduct of making butter from fresh cream is essentially skim milk.  The point here is to get a good source of beneficial bacteria, which fresh cultured buttermilk and fresh yogurt both have.  Simple milk or cream that has not been cultured will not have much of the good bacteria you want.  You can also buy good direct set cultures as well as rennets online at cheese suppliers such as New England Cheesemaking and Dairy Connection.  Professional cultures like this cost a little more but deliver more consistent results.  However I have made cheese using yogurt as the starter culture many times with good results.   For fun I once made a bottle of clabbered milk by adding some yogurt and aging it at room temperature for a day, and I then used that as a starter to make a couple of hard cheeses.   I do not recommend that as a usual practice as the results can be highly variable.  It was just an odd experiment that happened to work ok that time.

Happy Cheesemaking!!!

May. 2012 26

Updates

It has been too long since I have posted so I will post a list of quick updates.  I have been sick with the flu for a couple of weeks and a lot of other things are going on so I have neglected the blog for awhile.

  1. I underestimated the ability of my cheese aging fridge to suck humidity out of the air and ruined several cheeses, including the Arrogant Bastard cheese.  I am now using large Rubbermaid containers to give the cheeses their own micro-climates in the same fridge.
  2. In early April I attended an advanced cheesemaking class taught by Three Shepherds Cheese and hosted by Eagle Mountain Farmhouse Cheese in Granbury, Texas.  Linda and Larry Faillace conducted a wonderful class and I met several remarkable people who wanted to learn to up their game in cheese making.  I highly recommend this class to anyone interested in cheese making.
  3.  The CheeseWife™ made some videos about the Cowtown Farmer’s Market and posted them to YouTube.  Many communities have small farmers markets that few people know about or take time to visit.  I will be writing more about local foods in later posts.
  4. After learning more about modern cheese molds, I ordered some Kadova molds and am really pleased with the results.  They are really expensive but worth it.
  5. I have been buying milk recently from Campbells Classic Dairy near Cleburne and am really enjoying the resulting cheeses.  John and Regina Campbell have mostly Jersey cows and produce really great milk.

I will post some pictures about the cheeses I have been making soon.   Also, The CheeseWife™ will start blogging here soon as she gears up for Hogan Farms Texas Cheese Tour 2012.  She is planning to visit several cheese makers and mongers in this great state to interview people who love cheese for more YouTube videos and work on an article for one of the major regional magazines.